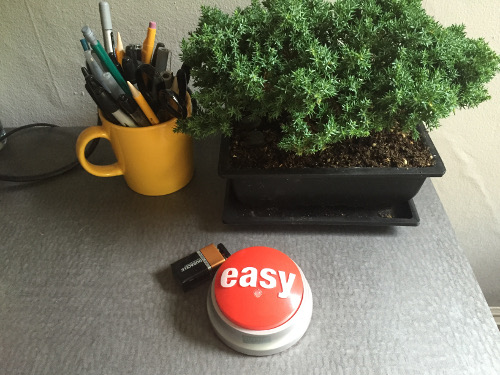
Uber Button
I took a Staples Easy Button, gutted it and put an Electric Imp inside of it so that I could press a big red button and call an uber to my house.
Origins
This project started out with a frustration I had with the Uber app: the promise of uber is being able to get a ride at the press of a button, but the process to go from thinking "I'd like a car to come to my house" and actually getting one looks something like this:
- Pull out my phone
- Unlock my phone
- Find the uber app
- Open the uber app
- Rate the last ride I took (I almost never bother to open the app after I get to my destination)
- Move the little marker to my home address
- Specify that I want UberX
- Press "Request a Ride"
- If there's surge, confirm that I'm ok paying extra
I wanted an experience that truly was "get a ride at the press of a button" — plus, I wanted to play around with physical interfaces to experiences that are traditionally digital.
About the Uber Button
The physical button is formed from a Staples Easy Button, which is fairly roomy and is really satisfying to press. Inside is an Electric Imp, which connects to my apartment WiFi and also takes care of running some server-side code for talking to the Uber API. There is also a tri-color LED for communicating status (requesting a ride, current ETA, surge price, etc.).
It's powered by an external 9V battery - my initial plan was to fit everything inside the button housing by using coin-cell batteries, but they don't provide enough current to power the Electric Imp's WiFi connection.
To request an Uber, you press and hold the button down for a second. The led throbs blue for a bit while making the request, and then flashes the car's ETA in minutes. The color of the led reflects the current surge price, with green being no surge, yellow being "moderate" surge (1.1x-1.5x) and red being "heavy" surge (>1.5x). So 3 yellow flashes would mean that your car is 3 minutes away, and you'll be paying a bit more than normal. The uber app on your phone will also send you push notifications as it normally does, so you'll know when the car arrives.
If you just want to know the current ETA and surge price, you can tap on the button, and it will flash you the ETA in minutes, with the color of the led reflecting the surge price in the same was as a request.
Building the Uber Button
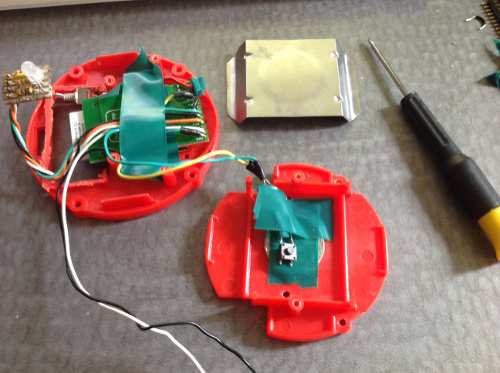
The first step in building the Uber Button was gutting the Staples Easy Button. I took it apart and then dremeled out the battery housing, as it was going to get in the way of where I was putting the Electric Imp. I also drilled out a hole in the front of the button that I could stick the LED through.
Next, I assembled a small module for the tri-color LED, soldering the 3 RGB signal wires and ground to a piece of protoboard with 3x 100 ohm resistors and the LED. This made a handy self-contained component so I could poke the LED through the housing and hot glue it all together.
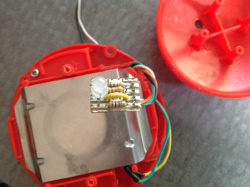
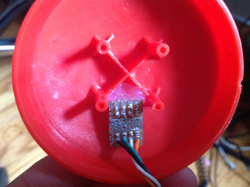
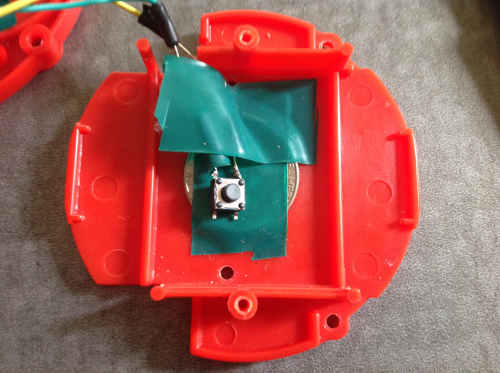
After that, I set up a small tactile switch and positioned it correctly so that it depressed at the right moment when you pressed on the button. This took a few tries to get right, and as you can see in the photo I ended up using a quarter as a shim. The big metal square is a leaf spring that gives the overall button the satisfying "pressed" feel - when it fully depresses, it also presses against the tactile switch, signaling the Electric Imp that the button was pressed.
Initially, I had the switch connected to ground with the Electric Imp pin configured as a pull-up input, but found that the Electric Imp chugged through batteries when left always on and connected to wifi. To remedy this, I connected the switch to 5V and the Electric Imp's "wakeup" pin, so that the processor can go into low-power sleep and disconnect from wifi, and then wake up and reconnect when the button is pressed.
Finally, I squeezed the Electric Imp into where the Easy Button's speaker used to be, along with a flip-switch as an on/off control for the device. The Easy Button has a nice rectangular window in the base of it for where the batteries normally go, which I made use of so I could turn the button on and off and see the Electric Imp status light without having to take the button apart.
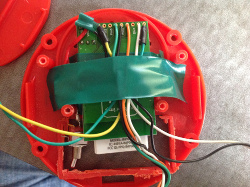
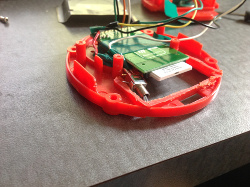
Putting it all together with a bunch of electrical tape and a few finishing touches, the hardware is now assembled and ready to go!

Writing the software to make it work was another fun project, which I may write up later. The main tricky parts were debouncing the button and getting the Electric Imp to sleep and wake up properly. The most fun part was coming up with all sorts of fancy color wheels and effects for the LED.
Reflections
All in all, this was a really neat project. I'm a big fan of the Electric Imp as a platform, and the Easy Button has a lot of properties that make it a great base for hardware projects. Now a year after I first made it, I still use the Uber Button occasionally, although these days I use UberPool quite a bit more than UberX, which doesn't lend itself to this interface because you have to put in the address of the destination before requesting.
It's also interesting that a couple of months after I hacked together this internet-connected button, a startup Bt.tn launched to do exactly the same thing.